People List Example
Adding a People List Block
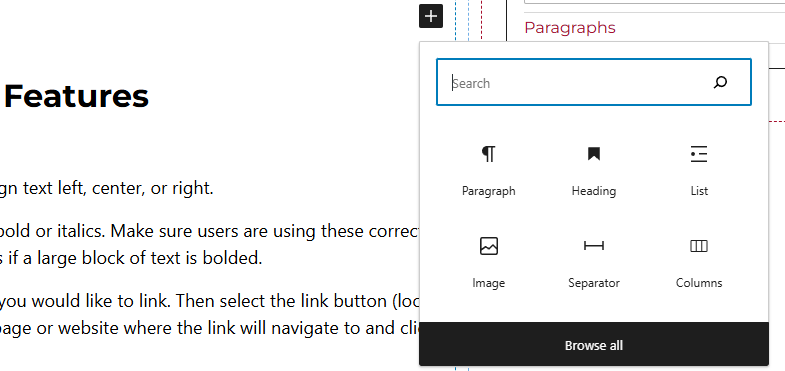
Method 1 – Use a forward slash (/) and then type out “people list”. The people list block should show up.
Method 2 – After selecting the editor, the user should see a + icon. Selecting this should show a list of the most common blocks used. If the people list block is not there, use the search feature to find it.
People List Block Features
Side Panels
After selecting the people list block, the user will see the following options on the right hand panels:
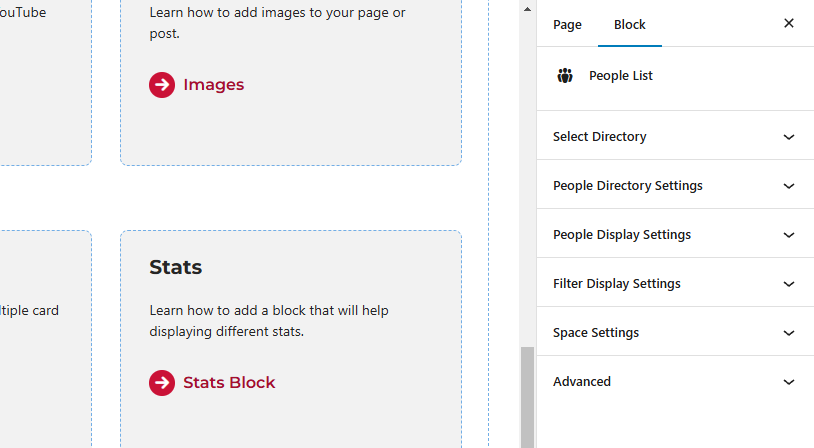
- Select Directory – In this panel, users can select a directory that has been created. The options for enabling View Profile and including directory site search can also be found.
- People Directory Settings – This panel gives the user the capability to return a specific amount of people profiles, pull in specific people by their network IDs, classification, university category, university location, university organization and university tag. Users can also set the order in which the profiles show up. Finally, users can select if all of the terms are required and what source is the people data being pulled in from.
- People Display Settings – Select how many columns should be displayed, the text for the website link, heading level, and which fields should be displayed under each person:
- Photo
- Name
- Title
- Office
- Organization
- Degree
- Focus Area
- Address
- Phone
- Website
- Filter Display Settings – Select what filters will be available to the website users. Filters include:
- Directory
- Classification
- Organization
- Location
- Category
- Tag
- Search
- Space Settings – Users can add margin to the block. This is usually done to add more spacing around block so they are not too close to other elements.
- Advanced – Allows users to schedule the block, position the block, and hide the block on a specific breakpoint. Here the profile page link can also be added.
- Block Scheduling (if enabled) – Allows block to be scheduled. This causes the block to be published or unpublished depending on the date selected.